Tampilkan postingan dengan label fire. Tampilkan semua postingan

Selasa, 21 Juni 2016

Gas Fire Flue Odd Jobs

I have welded up the deck drain I had to cut to get the generator in, welded the generator flexible feet to the uxtor plate (base of the boat in that area), welded the bracket for the raw water strainer on, soldered the T junction for the raw water strainer to share the input with the engine and the generator.

The parts for the rudder have been ordered and I have sent the rudder shaft to the machine shop for the key way to be cut and the bottom bearing to be made and started to put up the frame work for the rest of the ceiling.

The principle showable job today though was the flue for the gas fire.  Once again out came the trusty plasma cutter.  The diameter of the flue was 115mm which is the same size as a 115 grinding disk which I used as a template.  The flue needs a bit of clearance and the distance that is gained when the disk was used as a template was just right, about 3mm all the way round.

Quiz.  Im facing due East when I took this photo on 25/5/11. 
What time was it?  Same latitude as London.

In preperation for the hole cutting I removed the spray foam insulation and lined it with a metal shield.


Then to catch and cool the plasma ejector a bucket half filled with water was positioned using a ratchet prop.


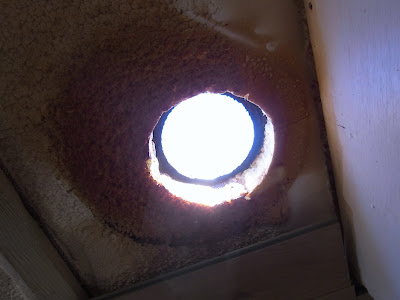
Once cut and the shield material removed this was the hole.

The flue may as some point in the future need to be removed so it will be fixed with an external flange.  Bring out the plasma cutter again.  The center hole was done using a worn 115mm cutting disk and the outer using a worn 250mm disk.  I like to keep it simple :-)
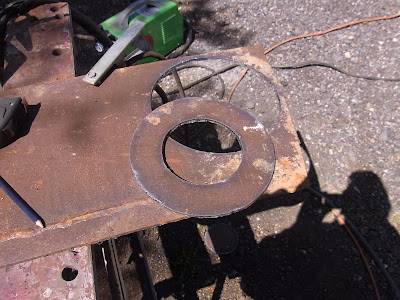
Thats me in the shadow


The flange will be welded to the flue once the levels are set.  I need to get my brother to make me a hearth first.  But this is something how it will look.


In case you were wondering why a gas fire?  Well, I think its a good idea to have a secondary form of heating on a different fuel just in case.  There was no way I was going for a solid fuel solution, all that logs and coal and ash.  Na, NOT for me!!!
Read More..

Jumat, 10 Juni 2016

Gas Fire Fitted

I bought this fire about 5 years ago with the intention of fitting it in our previous boat but never got round to it.  I got it off e-bay brand new and delivered for a stupid winning bid of £50. 


I then bought the canopy and an LPG conversion kit and that came to £120, so all in all a bargain.

I am glad I didnt fit it in the other boat now as it chucks out so much heat.  It would have been way too much for the space.

I have made the flue from 3mm walled tube which catches and radiates loads more of the otherwise wasted flue heat.


So why a gas fire you may ask as I have oil CH.  Well 3 reasons, as a secondary form of heat in case the CH fails for any reason, as a focal point and also gas because as a second source Id rather carry a gas bottle than logs or coal and theres no ash to clear up and the heat is on and off on demand.  OK I know firewood can be generally gathered for free, but I really cant see myself gathering and chopping and storing etc.

A local wood turner made me this oak flue trim which I am delighted with.  He is going to make the trims for the mushroom vents when I know the size.


A lot of preparation has been going on in the bedroom.  Next week I should finish the bed and furniture fitting.  The bed base is made and the first wardrobe is in place.
Read More..

Selasa, 15 Maret 2016

Headoard Kitchen Work

The custom made headboard was collected from the makers last Saturday.  I needed to finish making the bed base and once that was done I could fix the headboard in place.


The bed base lifts up to access a storage space.  Once I have the mattress  (Next Thursday) I can weight it and the base then I can get some gas struts made to the require lifting force to assist with and hold the base up when required.

I have been preparing the kitchen for the breakfast bar, while doing this it became apparent the island unit was pretty mobile at the end section.  This, in a stationary house is no problem but on a boat which moves about could be a problem especially as the weight of the worktops would act as a massive lever if the boat were to thing anything head on, or indeed if while being transported the lorry had to break suddenly.

A solution was needed.  Screwing through the end unit base would not be strong enough the load needed to be transferred through the vertical walls.  

I knew one day I would have a use for the really long screws that came with the engine crate.  

The head is 17mm AF to give it scale

I made a bracket to transfer the load through the vertical panel and some filler blocks to bear down onto once the screws were done up.

Glued and screwed

Stop blocks and 3 screws into the floor

The island end is now nice an rigid now. I will make a nice cover the the metal bracket to hide it in due course. 
Read More..
 
boat design plans - Powered By Blogger